
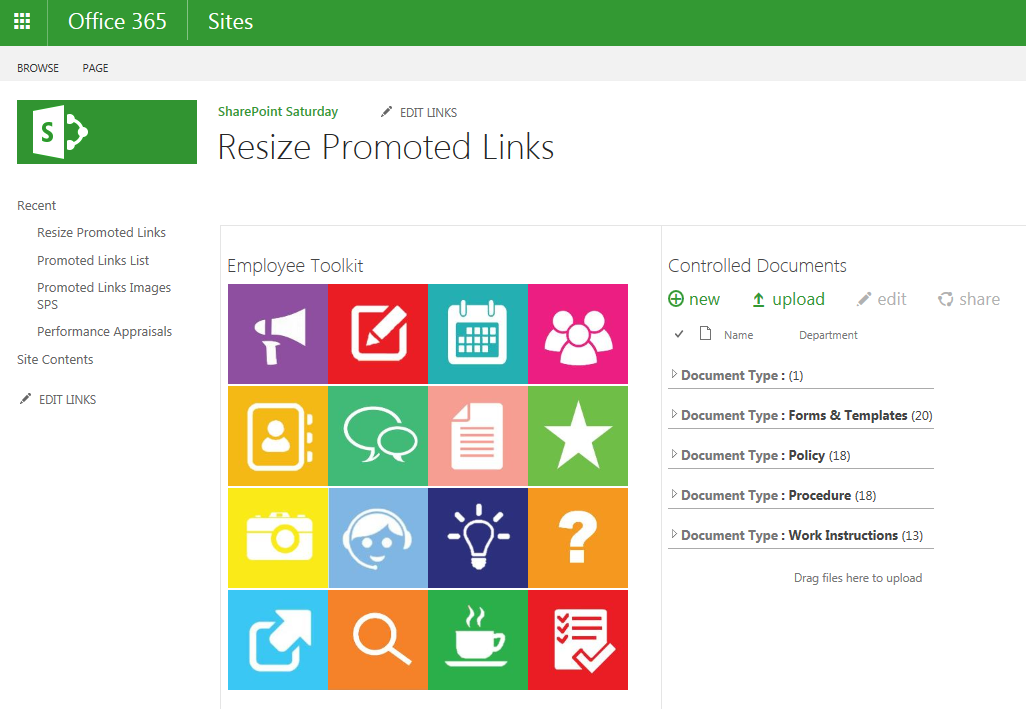
In this blog we’ll be looking at resizing the promoted links (default size is 150x150px) and wrapping them to create an Employee Toolkit.
For more information on Promoted Links, see my previous blog: The lighter side of Microsoft #15: Wrapping Promoted Links in SharePoint
Step1: Create the Promoted Links Images:
1. Create the images you would like to use (or download)
2. I’ve used coloured shapes in PowerPoint (of course, because I LOVE PowerPoint), then added white icon images (transparent background) over the shapes
3. I used Snipping tool to snip the images which will become the Promoted Links images. I saved these as ML001, ML002 so that I would remember the sequence (I want the buttons to be in a specific order)
4. NOTE: It’s important that these images are EXACTLY square. If it’s 100 x 101px it will “stretch” on the page. It does not have to be the size you end up chosing – it must just be square and it will automatically scale.

Step 2: Create image library for the Promoted Links Images:
1. Site Settings > Add an app > Picture Library = Name: Promoted Links Images
2. Now upload the 16 Promoted Links Images in this Picture Library
Step 3: Create Promoted Links list:
1. Site Settings > Add an app > Promoted Links = Name: Promoted Links List
2. In this Promoted links list – add 16 lines which references the images you’ve uploaded (in the picture library) as well as the name & URL(website) for the Promoted Link
3. Use the “All Promoted Links View” to add lines
4. Remember the sequence needs to be as per the order you would like to see on the page.

Step 4: Create a Wiki Page (or web part page):
1. Site Settings > Add a page > Name: Wrapped Promoted Links (Your own name)
2. In edit mode on this page, add the Promoted Links Web part
3. Insert Tab > Web Part > apps > Select the Promoted Links List you created in Step 3.
4. The Promoted Links will now be added – but in a straight line (all 16 next to each other) as per the OTB SharePoint.
NOTE: Steps 1 to 4 are the usual steps for creating (horizontal) promoted links in SharePoint 2013.
Step 5: Code:
1. Upload the latest Jquery version .JS file on your Site Assets (if necessary to reference in code). I’ve used jquery-1.10.2.min. You can find the latest versions here:
2. Click here to use the file I downloaded
3. Upload the .JS file with the code. You can find the code here, save file as a .js file and upload to your Site Assets. Remember to change the reference to the jQuery as well as the Links per Row, Image Size and name the web part (see image below).

Step 6: Add the Content Editor Web Part to your page:
1. Insert Tab > Web Part > Media and content > Content Editor
2. In the “Content Link = To link to a text file, type a URL” paste the link to the JS file (Step 5, part 2).
3. Remember to (if necessary) set the Chrome State on your Script Editor to None – so that users won’t see it on the page.
4. Apply changes to Web part, Save the Page.
NOTE: In the previous blog post I used a Script Editor (Snippet) and pasted the code “on” the page. In this blog I used a Content Editor and referenced the file. This means I can reference the same code from different content editors across my site. Also if I make a change to the code – it will update all the pages that use it.
You can now change the size of the promoted links to 75, 100 or 150, and you can also change how many items should appear in a row (wrap).
Voila!! Till next time.
May 14, 2016 at 6:44 pm
Hello, I have a problem in this script. It’s working, but my last image is always with the standard size … you know what might be goin ‘?
Thank you.
May 14, 2016 at 6:55 pm
Hi Diogo. You’ll have to give me more detail for me to be able to help. Are you saying the last image of the group of images aren’t resizing? Did you change the desired size in the script?
August 22, 2017 at 6:43 am
Hi Tracy, I am struggeling with “name the WPQ here” in your screenshot. How does the “2” matches with your example where the webpart seems to be named “Employee Toolkit”. I was assuming the title of my webpart (here “PromotedLinks”) would be the name. Thanks!
August 22, 2017 at 7:26 am
Hi Peter, haven’t done that in such a long time – will have to go have a look. That’s only applicable if you have multiple promoted link web parts on the page. How many do you have?
April 28, 2018 at 7:30 am
Cannot find the js file. Could you let me know?
April 28, 2018 at 8:25 am
I see the public SharePoint sites have eventually been decommissioned. 🙂 Let me see if I can move the file for you to OneDrive and replace the link.
May 3, 2018 at 4:01 pm
cannot find the JS file. Step 5: “Click here to use the file I downloaded” “You can Find the code here “could you please let me know where do I get from?
May 3, 2018 at 4:38 pm
Hi. I have to replace it as it was hosted on the external SharePoint site which has now been discontinued by MS. Will update in next couple of hours. Thanks for the reminder.
May 4, 2018 at 2:37 pm
Hi,
Did you get a chance to upload this files, I have an urgent requirement, Your help is highly appreciated.
Thanks,
Regards,
Faizan
May 4, 2018 at 7:50 pm
Hi there. Yes I did, found the files and re-shared from OneDrive. Regards
October 17, 2019 at 10:05 pm
This works great for a single promoted link list. I’m creating one for my office to integrate with Jquery tabs. When I add a second promoted links list, it combines them and only applies the new sizes to half of them.
October 18, 2019 at 5:22 am
Yup. It applies to all on page.