#Office365Challenge – Rating Settings in SharePoint. “When you enable ratings, two fields are added to the content types available for this list and a rating control is added to the default view of the list or library. You can choose either “Likes” or “Star Ratings” as the way content is rated.”
| Day: | 38 of 365, 327 left |
| Tools: | SharePoint Online; SharePoint 2013 |
| Description: | Rating Settings in SharePoint |
Quite a nifty little feature in SharePoint is the rating settings. If you have a library where you would like the users to rate the content, this is the way to go!
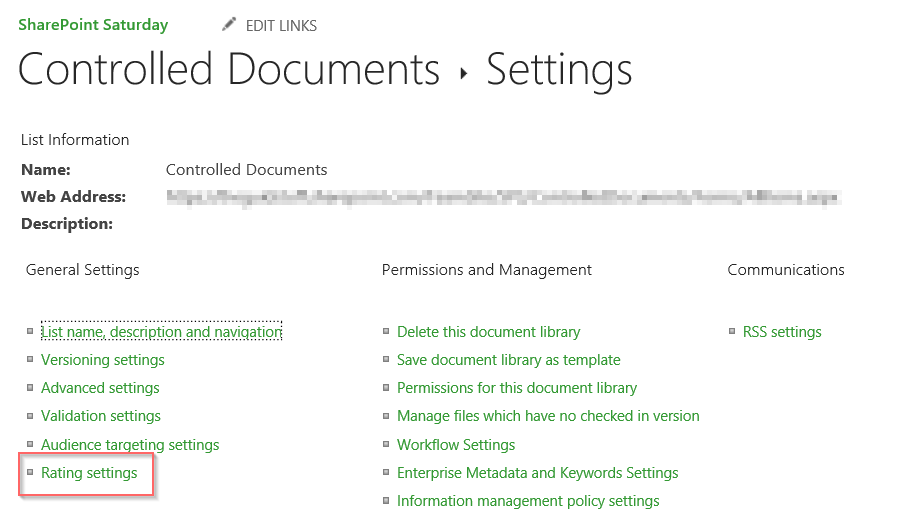
To configure these settings, go to the Library Tab > Library Settings. Click on Rating Settings:

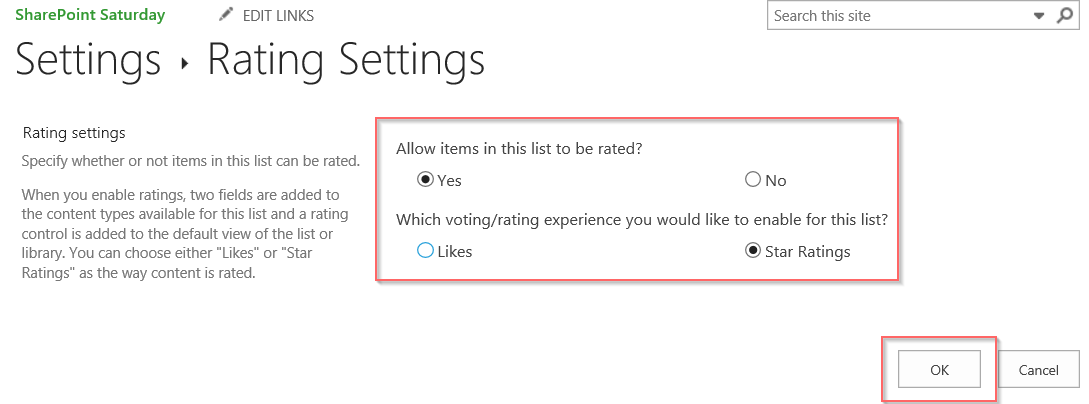
Here you’ll be able to choose to switch on the settings and what you’d like it to display as. Rating stars or Likes. SharePoint will calculate the average ratings click for all users.
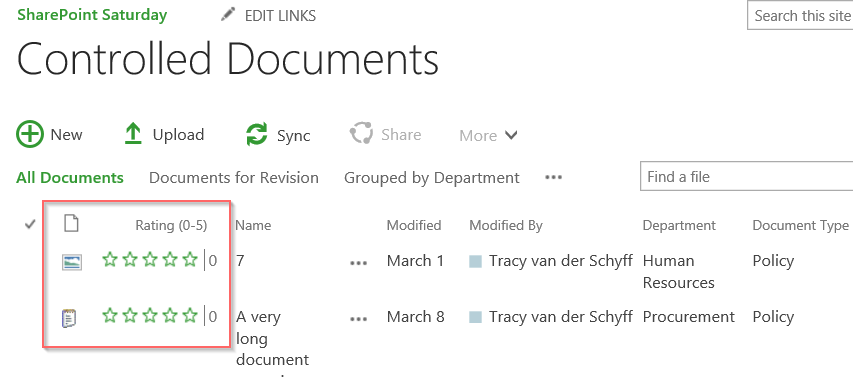
This is what rating stars will look like:
This is what Likes will look like:
And there you go cupcakes. Another awesome thing SharePoint does for you – Out of the Box!
Overview of my challenge: As an absolute lover of all things Microsoft, I’ve decided to undertake the challenge, of writing a blog every single day, for the next 365 days. Crazy, I know. And I’ll try my best, but if I cannot find something good to say about Office 365 and the Tools it includes for 365 days, I’m changing my profession. So let’s write this epic tale of “Around the Office in 365 Days”. My ode to Microsoft Office 365.
Keep in mind that these tips and tricks do not only apply to Office 365 – but where applicable, to the overall Microsoft Office Suite and SharePoint.


1 Pingback