 #Office365Challenge In todays post we’ll be looking at creating groups in SharePoint for permissions.
| Day: | 216 of 365, 149 left |
| Tools: | SharePoint |
| Description: | SharePoint Groups for Permissions |
Related Posts / Resources:
Default permission levels in SharePoint
Understanding permission levels in SharePoint
How are Permission levels made up?SharePoint Permissions – what’s your strategy? Part 1
Around the Office in 365 Days: Day 213 – SharePoint Permissions – what’s your strategy? Part 2
Around the Office in 365 Days: Day 215 – How to change permissions on items in SharePoint
Around the Office in 365 Days: Day 2 – Item-Level Permissions in SharePoint
The lighter side of Microsoft #8: SharePoint Libraries with folder permissions
First things first. Be VERY careful when changing permissions when it comes to groups. I cannot tell you how many times I’ve seen users click on a group which has permissions to a specific app – then remove the people in the group, only to break everything else across the site that uses that same group.
As explained before, you can add a single person to a page, item, app or site. Best practice would be to rather add a group which has members in it. This makes it ‘reusable’ as you can use this group again on other apps etc.
Example: You have created a new flight booking solution. Instead of adding the 12 HR Administrators directly on the app for permissions, rather create a permissions group called HR Administrators and add the users in the group, then add the group to the app for permissions.
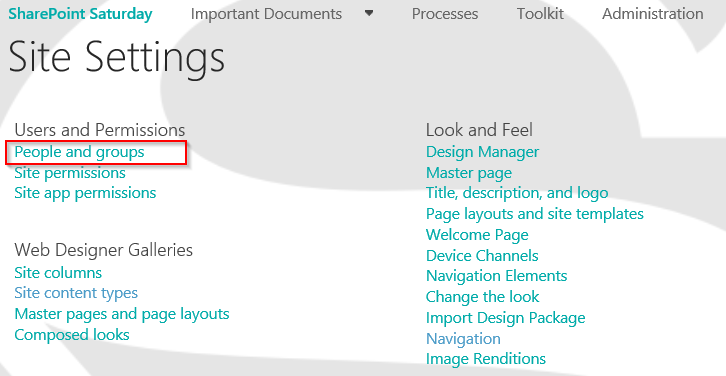
To view the groups on a SharePoint site, or make additions / modifications, go to the Site Settings > People and Groups:
Click on More to show all the groups:
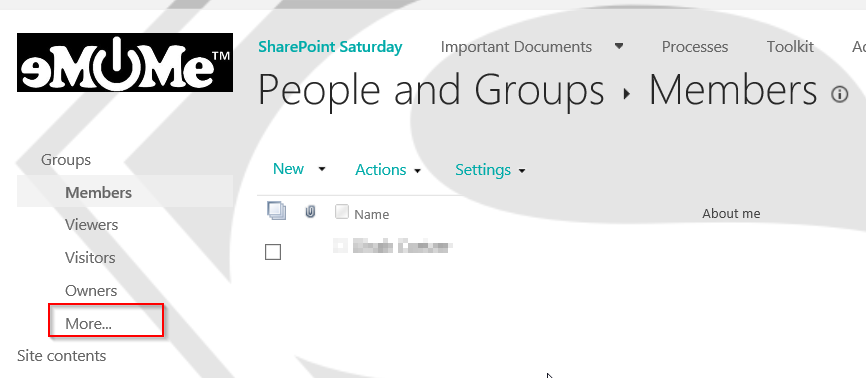
This is how you would add new users to existing groups (open the group by clicking on it), then click on the New dropdown:

In the view that lists all the groups (after you clicked More on the left), you can also add new groups.

These are the fields you should complete when adding a group:
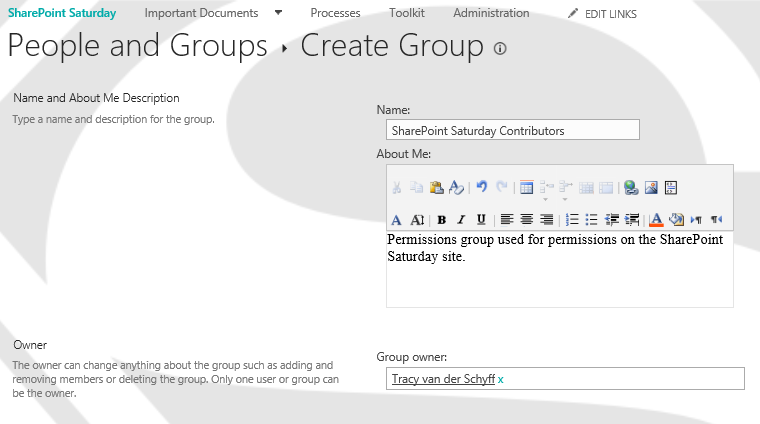

Note: On Office 365 where no Active Directory is provisioned (using Azure AD), the users are actually picked from the licensed users on the tenant. Where Active Directory is used, you are also able to pick security groups from AD.
Tomorrow we’ll take a look at unique permissions on sites and apps.
Overview of my challenge: As an absolute lover of all things Microsoft, I’ve decided to undertake the challenge, of writing a blog every single day, for the next 365 days. Crazy, I know. And I’ll try my best, but if I cannot find something good to say about Office 365 and the Tools it includes for 365 days, I’m changing my profession. So let’s write this epic tale of “Around the Office in 365 Days”. My ode to Microsoft Office 365.
Keep in mind that these tips and tricks do not only apply to Office 365 – but where applicable, to the overall Microsoft Office Suite and SharePoint.
2 Pingback