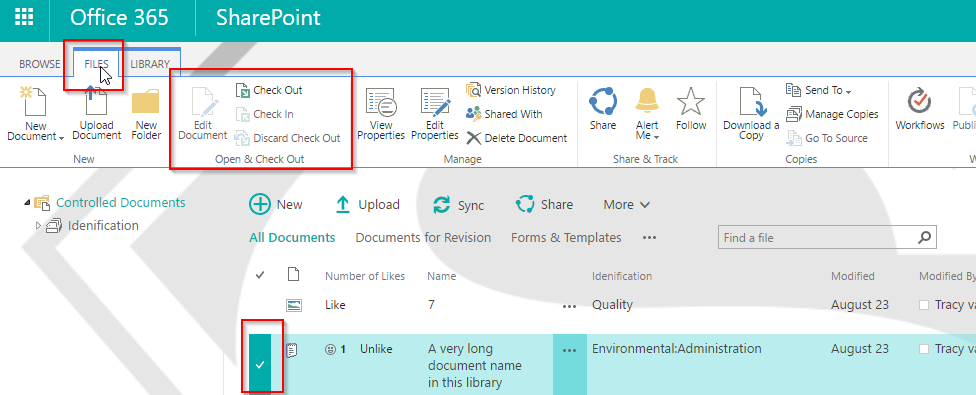
 #Office365Challenge So a file’s checked out and you want to discard that immediately?! (Haha, really having some fun with these WikiHow Images). This post covers the permissions you need to view other users’ checked out files and how to manage them.
Day: 330 of 365, 35 left
Tools: SharePoint 2016, Office 365
Description: Manage and Discard Checked out files in SharePoint
Audience: All
Checked out files:
In a previous post I explained how to check files in / out using the menu on the ellipses or the ribbon.
Using the ellipses:
Using the ribbon:
Now we all know that with ‘normal’ contributor rights, you cannot see other people’s files which are checked out. I do however understand why document controllers, compliance administrators etc. would want to see all files which are checked out. The real issue is the permission levels.
Looking at the table below – you’ll notice that to have the “Override Check-Out” permission attribute – you need to have either Full Control, Design, Approve or Manage Hierarchy Permissions. These are very powerful levels to assign, and could be a dangerous move if all they need is to view checked out files. Also important to keep in mind if you discard (override) some else’s check out – they will lose any work since the last check in.
List permission levels:
You might just want someone with Contribution rights, to also view all files which are checked out. What I do suggest is to create an unique permission level which only includes the attributes you can safely assign. You will only be able to create unique permission levels if you belong to the Owners group (Full Control) or if you are a Site Collection Administrator.
At his point I was going to link to one of my blogs which explain how to create these unique permission levels – and guess what – nada. So check back tomorrow as Day 331 of my challenge will then be about creating unique permission levels. If you read this blog later – just search my blog (I’ll try my best to remember to add the link here tomorrow).
Till later.
Overview of my challenge: As an absolute lover of all things Microsoft, I’ve decided to undertake the challenge, of writing a blog every single day, for the next 365 days. Crazy, I know. And I’ll try my best, but if I cannot find something good to say about Office 365 and the Tools it includes for 365 days, I’m changing my profession. So let’s write this epic tale of “Around the Office in 365 Days”. My ode to Microsoft Office 365.
Keep in mind that these tips and tricks do not only apply to Office 365 – but where applicable, to the overall Microsoft Office Suite and SharePoint.


Leave a Reply