Search

Tracy van der Schyff

Facilitating The Evolution of Human Capabilities

Search results

"transition"

Day 332 – Using the Effect Options in PowerPoint Morph Transitions

ATOI365D    #Office365Challenge Any day I can write about PowerPoint is a good day. Today I’ll share something about using Morph transitions that I didn’t know – and makes a HUGE difference! Effect Options.


Day:  332 of 365, 33 left
Tools:  PowerPoint 2016, Office 365
Description: Using the Effect Options in PowerPoint Morph Transitions
Audience:  All
morph3

PowerPoint has a brand-new transition type, Morph, that can help you make smooth animations, transitions, and object movements across the slides in your presentation. You can apply the Morph transition to slides to create the appearance of movement in a wide range of objects, such as text, shapes, pictures, SmartArt, WordArt, and charts. – Microsoft

Using Morph to Transform your PowerPoint:

I have explained the exact how to’s in a previous blog, here I’ll show you how to make it even better!

In the short video clip below, you’ll see that I have two slides. There is text on both, and I’ve added shapes to both. Morph will transition these text and shapes into the next slide.

The Morph transition is selected on the second slide, and on the right you’ll see Effect Options. There are 3 types:

  1. Objects
  2. Words
  3. Characters

2017-01-26-21_32_45-example-powerpoint

Objects will only Morph the objects (shapes), Words will Morph full exact words and Characters will Morph Shapes and characters of the text. The transition is not as smooth as it will appear on your side (I blame the 30 PowerPoint files and 200 Browser windows I have open at the same time):

Hope you enjoy it as much as I do.

Overview of my challenge: As an absolute lover of all things Microsoft, I’ve decided to undertake the challenge, of writing a blog every single day, for the next 365 days. Crazy, I know. And I’ll try my best, but if I cannot find something good to say about Office 365 and the Tools it includes for 365 days, I’m changing my profession. So let’s write this epic tale of “Around the Office in 365 Days”. My ode to Microsoft Office 365.
Keep in mind that these tips and tricks do not only apply to Office 365 – but where applicable, to the overall Microsoft Office Suite and SharePoint.

Day 231 – Transitions between PowerPoint Slides

ATOI365D

#Office365Challenge Yup – still on PowerPoint (CAUSE IT’S SO AWESOME!!!). Let’s take a look at transitions between slides.

Day: 231 of 365, 134 left
Tools: Office 365 / PowerPoint
Description: Transitions between PowerPoint Slides

Slide transitions are great for “filling the gaps” between one slide to the next. As with everything in life – too much is overdoing it. I actually use transitions to help me pace myself, and give me a chance to breath. Add ADHD to public speaking and you have a disaster. By slide 3 I’m talking so fast I’m on a different frequency – and all because I get so excited / passionate about “what I do”. So transitions really do help with “slowing me down” a bit.

Slide transitions are the animation-like effects that occur when you move from one slide to the next during a presentation. You can control the speed, add sound, and customize the properties of transition effects. – Microsoft

To add transitions is really easy, the difficult part is not overdoing it or making your presentation look “tacky”. I use max 2 – 3 different types of transitions in a 30+ slide deck.

In the short video (no sound) I’ll show you how I add transitions on some slides and what it looks like in Presentation mode. I’ve added some crazy ones to illustrate. Go play with the other types, and find something that works for you:

To add a transition, click on the slide it will transition to, then click on the Transitions Tab. Here you will see many options (choose wisely). Select the transition you would like to use. Go to presentation view to see the result:

transitions

Here’s your preview:

Proudly created with Office Mix.

Enjoy!

Overview of my challenge: As an absolute lover of all things Microsoft, I’ve decided to undertake the challenge, of writing a blog every single day, for the next 365 days. Crazy, I know. And I’ll try my best, but if I cannot find something good to say about Office 365 and the Tools it includes for 365 days, I’m changing my profession. So let’s write this epic tale of “Around the Office in 365 Days”. My ode to Microsoft Office 365.
Keep in mind that these tips and tricks do not only apply to Office 365 – but where applicable, to the overall Microsoft Office Suite and SharePoint.

Day 230 – Using Morph Transitions in PowerPoint

ATOI365D

#Office365Challenge If you have Office 365, you might have noticed a new Transition style = Morph. In this posts I’ll show you how to use Morph to apply some really cool animations, without building all those actual animation steps.

Day: 230 of 365, 135 left
Tools: Office 365 / PowerPoint
Description: Using Morph Transitions in PowerPoint

And I’m still on my favourite topic:  PowerPoint. Today I learnt about using Morph for Transitions. Didn’t notice it before so I was rather keen on trying it.

PowerPoint has a brand-new transition type, Morph, that can help you make smooth animations, transitions, and object movements across the slides in your presentation. You can apply the Morph transition to slides to create the appearance of movement in a wide range of objects, such as text, shapes, pictures, SmartArt, WordArt, and charts.

I’ve used animations quite a bit – but it can be very tricky to build and streamline all those changes. Morph really is a great way to create smooth transitions with same objects. In the video below you’ll see the basics (I didn’t add sound as I have 1,000,000 birds chirping in my garden and I thought I’d save you the wildlife recap 🙂 ):

  • I started with my “end state” slide, then duplicated it to have two more copies.
  • I then changed the first and second slide objects to create the “from and to – state” animations.
  • On slide 2 and slide 3 I added Morph Transitions. Voila!!!

Note:  I created this Video using PowerPoint Office Mix.

Cannot wait to use Morph for some more creative PowerPointing!

Overview of my challenge: As an absolute lover of all things Microsoft, I’ve decided to undertake the challenge, of writing a blog every single day, for the next 365 days. Crazy, I know. And I’ll try my best, but if I cannot find something good to say about Office 365 and the Tools it includes for 365 days, I’m changing my profession. So let’s write this epic tale of “Around the Office in 365 Days”. My ode to Microsoft Office 365.
Keep in mind that these tips and tricks do not only apply to Office 365 – but where applicable, to the overall Microsoft Office Suite and SharePoint.

Day 319 – Woohoo to the new Zoom Feature in Microsoft PowerPoint

ATOI365D #Office365Challenge It feels like I’ve been waiting for this FOR EVER!! That update just wouldn’t come through. Anyway, now I have it and I can tell you about the new Zoom Feature in PowerPoint. This allows you to Zoom in on sections and slides as well as jump between slides. Enough talk, let me show you…


Day:  319 of 365, 46 left
Tools:  Office 365, PowerPoint
Description:  Woohoo to the new Zoom Feature in Microsoft PowerPoint
Audience:  All


130117001

What does Microsoft say?  If you’d like to make your presentations more dynamic and exciting, try using Zoom for PowerPoint. When you create a Zoom in PowerPoint, you can jump to and from specific slides, sections, and portions of your presentation in an order you decide while you’re presenting. Read more…

(If this feature is not available in your Office 365 / Office 2016 PowerPoint – confirm with your Admin whether you are set as first release tenants and update your Office. We had to change our release preference – then I had to reinstall Office and run the updates again. This update was released in July 2016.)

Trust me when I say – the easiest way to learn this – is to play around with it.

There are 3 Types:

Summary Zoom

The Summary Zoom is a great way to create an index page with all your sections neatly on one page. It will automatically present it in “mosaic” format / card style.

Section Zoom

With Section Zoom you can get really creative. I love this idea for roadmaps, value chain links, progression etc.

Slide Zoom

Slide Zoom allows you to smoothly move on to your next slides, while ‘getting the bigger picture’.

To add Zoom to your slide – click on Insert > Zoom and select the type. It will ask you to select the slides you would like to use.

130117002

Pick the slides / sections you would like to use:

130117004

The pages will appear stacked on top of each other (except if you’re using the Summary Zoom). Now get creative – move these all over the page, make some of them smaller / larger and even turn them sideways or upside down. This will make the transition really interesting. In my Section Zoom example below I even inserted a “roadmap” background and stacked my slides around that.

130117005

Test your creating by going to Presentation mode. Once a Zoom is created, you will notice the Format Toolbar for Zoom appearing if you select any item on that page. Here you’ll see various settings related to your Zoom.

130117003

Here are examples of how the 3 different types of zoom will display in Presentation mode (yes they’re silent – at least they’re not black and white 🙂 )


Hope you’ll love it as much as I do!!

Overview of my challenge: As an absolute lover of all things Microsoft, I’ve decided to undertake the challenge, of writing a blog every single day, for the next 365 days. Crazy, I know. And I’ll try my best, but if I cannot find something good to say about Office 365 and the Tools it includes for 365 days, I’m changing my profession. So let’s write this epic tale of “Around the Office in 365 Days”. My ode to Microsoft Office 365.
Keep in mind that these tips and tricks do not only apply to Office 365 – but where applicable, to the overall Microsoft Office Suite and SharePoint.

Microsoft 365 Day 29: Stream 101 & Resources

#Microsoft365 – Microsoft Stream is a relatively new video streaming service for business, launched by Microsoft. Used to upload, view and share videos securely within your organization.


For previous posts in my #Microsoft365Challenge go to the index page.

Microsoft Stream is the video management and sharing service for employees at all levels across businesses of all sizes who are interested in using videos in the workplace to connect, collaborate, learn and share information. Anyone can search for videos easily and consume them on their device, whenever and wherever. Read more…

Good to know:

  • You can manage who views your video content
  • Secure application access is enabled by Azure Active Directory
  • Helps you organize content into Channels and Groups
  • Works with Teams, SharePoint, OneNote & Yammer
  • Can transition from Office 365 Video
  • Groups allows you to define a set of owners and members
  • A group has its own mini video portal, with highlights page showing trending and new content
  • A video can be shared to different groups
  • A group in Microsoft Stream creates a Office 365 Group
  • This Office 365 Group will have a distribution list, group email address, calendar and SharePoint Site
  • Deleting a group in Stream will also delete the group in Office 365 (files, content and conversations)
  • You have the option to set the group to “Companywide” or private.
  • Owners have full control, members can be set to view or contribute
  • Channels are for ‘grouping’ content – not for permissions
  • You can follow a channel and videos can be shared to various channels
  • Available on Windows, Mac, iOS & Android.
  • Microsoft Stream uses ABR (Adaptive Bitrate Streaming) which determines your bandwidth and adapts the best quality available.
  • Microsoft Stream supports Microsoft Edge and the current versions of Chrome and Safari.
  • Live streaming capabilities are currently not available.
  • Here’s a look at how intelligence is infused throughout the Microsoft Stream experience:
    • Speech-to-text transcribed audio—Transcribed audio becomes searchable text. Simply type in descriptive keywords to jump to any point in a video they are spoken.
    • Face detection—With face detection, viewers can see where each person in the video is shown throughout the video. A clickable timeline indicates every place they appear.
    • Linked timecodes—Timecodes are displayed within the comments section and are linked to the text transcripts or table of contents, so you can jump to a specific point in the video.”

Resources:

What is Microsoft Stream?
Microsoft Stream now available worldwide—new intelligent features take enterprise video to new heights

What Microsoft Stream means to Office 365

Purpose of this blog challenge:

I will write 365 blogs in 365 days around Microsoft 365 (not necessarily one every day). I did a similar challenge with Office 365, blogs can be found here. I won’t just be talking about the new Microsoft 365 subscription model. I will be sharing any news, tips and tricks around Office / Office 365 / Windows / Mobility and Security. And let’s not forget all the great new Apps & services available.  A lot of what I’ll share on Office and SharePoint will also be applicable to none “Office 365” versions.

Day 313 – Saving PowerPoint files as Videos

ATOI365D#Office365Challenge Do you have a PowerPoint with some great images, text, animations and transitions. Why not save it as a video file that plays by itself?


Day:  313 of 365, 52 left
Tools:  Office 365, PowerPoint
Description:  Saving PowerPoint files as Videos
Audience:  All


070117002

This is a great idea for family gatherings, celebrations, advertisements, conferences, exhibitor stalls etc. The list goes on.

Create the PowerPoint file:

First of course, you’ll have to create the PowerPoint file. Add all the text, images, animations and transitions. Remember to set the transitions between slides as well – this will allow the slide to proceed to the next slide on its own. Here are some help around Transitions & Animations in PowerPoint.

Save the file as a PowerPoint file:

Remember to save the file as a PowerPoint file (pptx) first in case you need to make some changes afterwards. Remember you can add some sounds / music as well.

Save the file as a Video File:

Now you can save your PowerPoint as a video file. Click on File > Save As.

Use either MPEG-4 or Windows Media Video (WMV):

070117001 

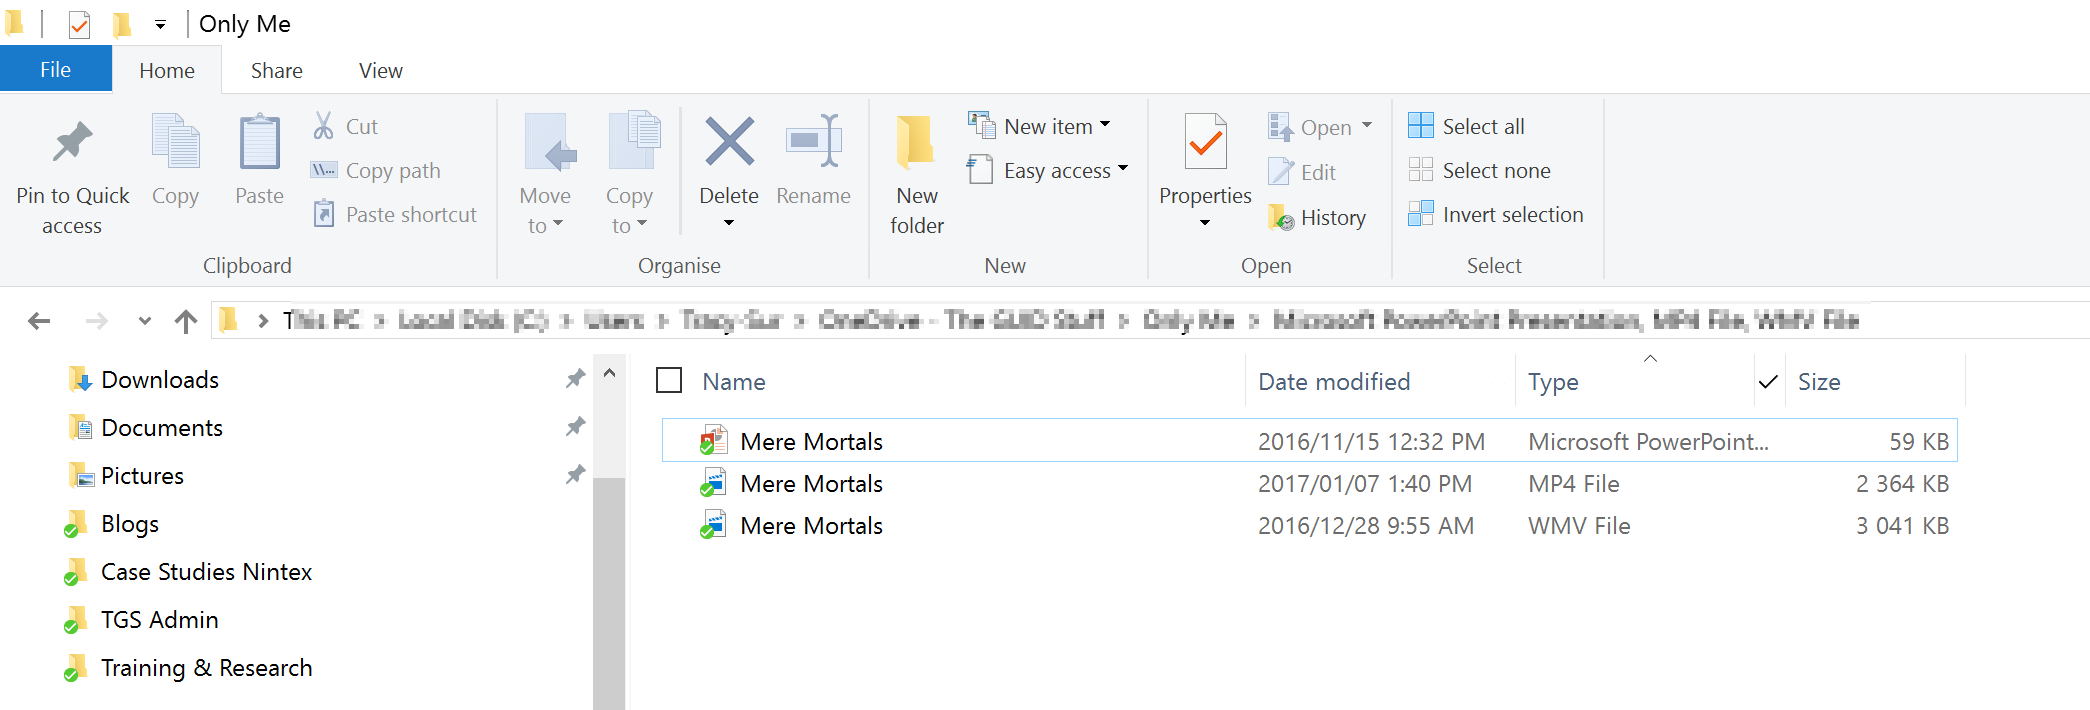
It takes a couple of seconds to create (depending on the length of your PowerPoint). As you can see they become rather large files – so take note of this when designing your ‘video’.

070117003

You can now share this video or upload to SharePoint / YouTube. Fun right? Below is the file I created and saved to YouTube:

Overview of my challenge: As an absolute lover of all things Microsoft, I’ve decided to undertake the challenge, of writing a blog every single day, for the next 365 days. Crazy, I know. And I’ll try my best, but if I cannot find something good to say about Office 365 and the Tools it includes for 365 days, I’m changing my profession. So let’s write this epic tale of “Around the Office in 365 Days”. My ode to Microsoft Office 365.
Keep in mind that these tips and tricks do not only apply to Office 365 – but where applicable, to the overall Microsoft Office Suite and SharePoint.

Up ↑