
#Office365Challenge – Inserting a Table of Contents in Word is one of the easiest ways to make your documents look super professional. It’s also one of the only things I know how to do in Word. Yup – I’m honest. My Word skills suck – so the next couple of posts will be all about Word – and believe me, I’ll be learning much more than you.
| Day: | 54 of 365, 311 left |
| Tools: | Microsoft Word |
| Description: | Inserting a Table of Contents in Word |
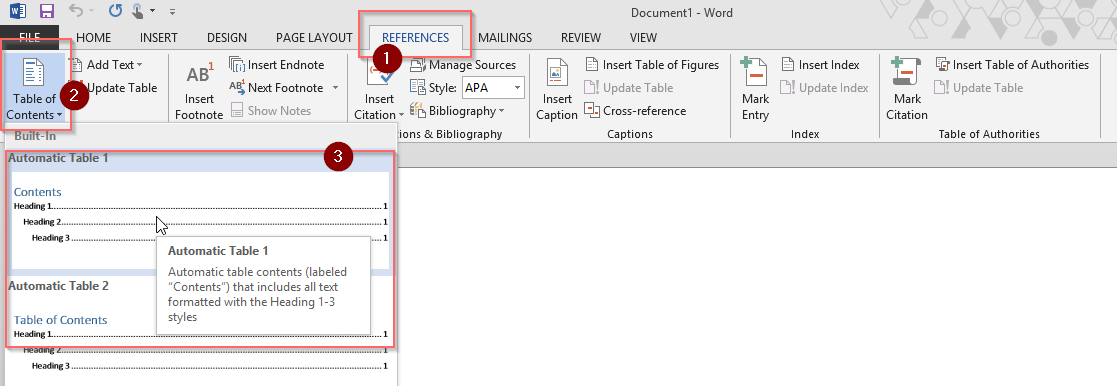
You can insert the Table of Contents – before you have content, which also makes it easier to structure content as you go along. To do this, click on the place where you’d like to add the Index, click on the References Tab (1), then on Table of Contents (2) and choose the style you would like to use (3), this can be changed later:
Once inserted, you’ll receive a message informing you how to add headings into your table of contents:

The table now appears on your Word document. As you start adding content with headings, you can select the heading (1), click on the References Tab (2), click on Add Text (3) and choose the level you would like it to appear on (4):

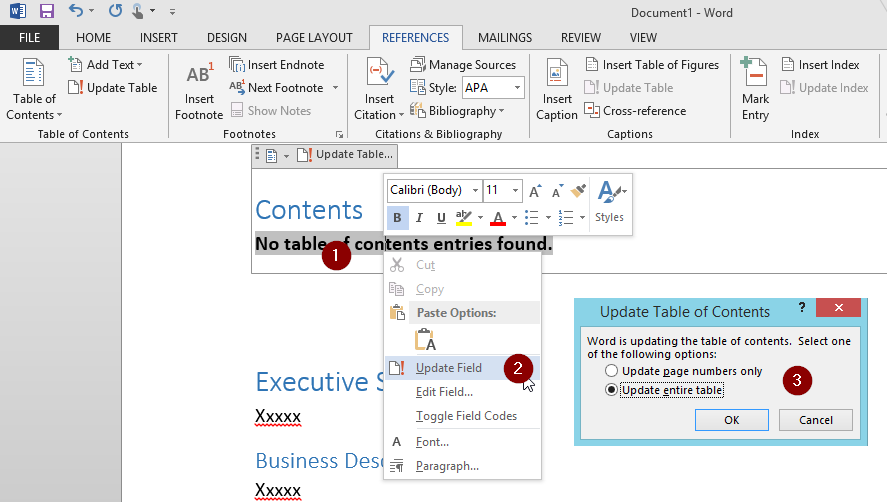
You have to update the table, do so by right-clicking on the table (1), and selecting Update Field (2), you might have to select whether you want to update only the page numbers, or the entire table (3):
This is what the table will look like. Keep in mind that you have to update the table before finalizing the document to refresh any changes you’ve made. Apart from this being the Index to your document, it also serves to be hyperlinks, which will when clicked on – take you to that place in the Word document.

Word for the Win!!
Overview of my challenge: As an absolute lover of all things Microsoft, I’ve decided to undertake the challenge, of writing a blog every single day, for the next 365 days. Crazy, I know. And I’ll try my best, but if I cannot find something good to say about Office 365 and the Tools it includes for 365 days, I’m changing my profession. So let’s write this epic tale of “Around the Office in 365 Days”. My ode to Microsoft Office 365.
Keep in mind that these tips and tricks do not only apply to Office 365 – but where applicable, to the overall Microsoft Office Suite and SharePoint.

Leave a Reply