
#Office365Challenge While we’re on web parts, let’s chat about applying target audience filters on web parts.
| Day: | 199 of 365, 166 left |
| Tools: | SharePoint |
| Description: | Target Audience on Web Parts |
Target Audience gives you the ability to make a web part visible to a selected group of people.
For example, if you add a promoted links web part on a page that displays all the admin functions, for super users only – you can then add target audience to the super users group.
You can use the following for target audience:
SharePoint Groups and Security Groups. If you cannot find a Security Group here, add the security group to a SharePoint Group and then select the SharePoint Group.
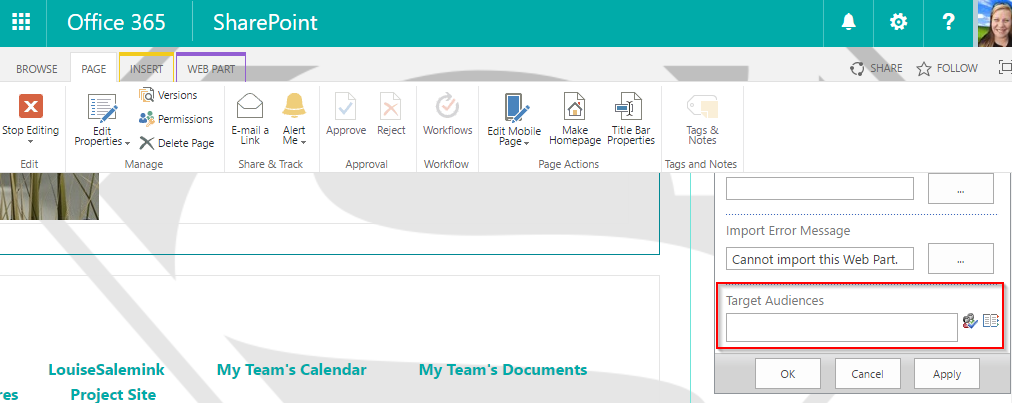
- Edit the Page
- Edit the Web Part
- Under Advanced you’ll see Target Audience
- Add the audience and Apply
- Save your page

Note: Be careful when applying these – based on the placement of your web parts you could end up with gaps on your page in strategic places. I would rather apply these on web parts to the right of the page or the bottom.
Join me tomorrow when I’ll chat about Target Audiences on List or Library Items.
Overview of my challenge: As an absolute lover of all things Microsoft, I’ve decided to undertake the challenge, of writing a blog every single day, for the next 365 days. Crazy, I know. And I’ll try my best, but if I cannot find something good to say about Office 365 and the Tools it includes for 365 days, I’m changing my profession. So let’s write this epic tale of “Around the Office in 365 Days”. My ode to Microsoft Office 365.
Keep in mind that these tips and tricks do not only apply to Office 365 – but where applicable, to the overall Microsoft Office Suite and SharePoint.

Leave a Reply