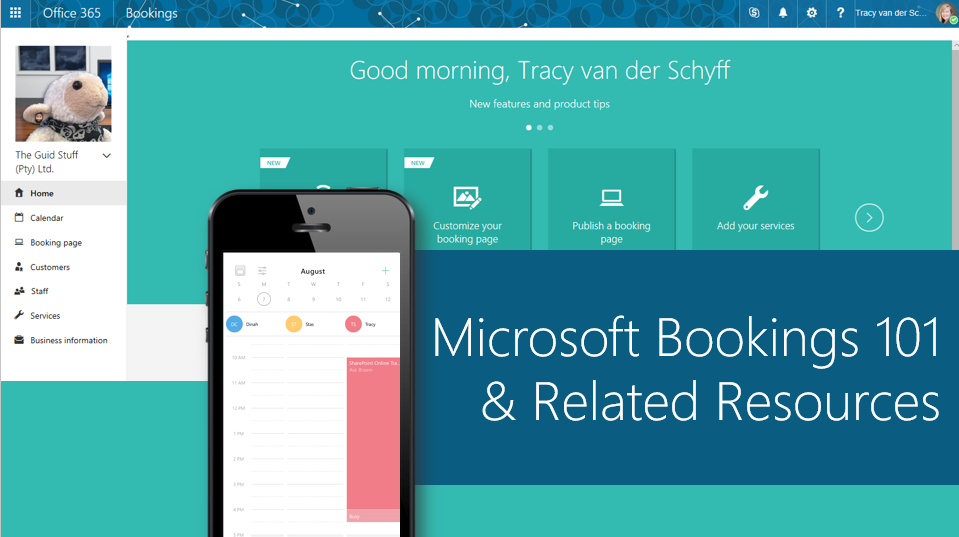
#Microsoft365 – I’m very excited to try out Microsoft Bookings today. It’s an online and mobile app for small businesses who provide services to customers on an appointment basis. I urge all my friends with small to medium size businesses to have a look.
For previous posts in my #Microsoft365Challenge go to the index page.
Before starting on Bookings I need to share why I so love what Microsoft is doing with Microsoft 365 / Office 365. Years ago when I started my business there was no way I could afford the internal IT resources or infrastructure needed to not only run my business, but to take it further. Developing apps was extremely expensive (still is), and it all changed when I bought my Office 365 subscription. My small one-man business now has access to all the same apps and services as Enterprise size companies. At a fraction of the cost. I have a Business Premium account which doesn’t include everything, but it has everything and more that I need to change my company into a Digital First Business.
What is Microsoft Bookings?
Bookings is available to Customers who have a Office 365 Business Premium Subscription. More about Office 365 Business Premium
Microsoft Bookings is an online and mobile app for small businesses who provide services to customers on an appointment basis. Examples of such businesses include hair salons, dental offices, spas, law firms, financial services providers, consultants, and auto shops. Bookings has three primary components:
-
A booking page where your customers can schedule appointments with the staff member who should provide the service. You can show this page on Facebook, where your customers can schedule appointments, or your own web site.
- A set of web-based, business-facing pages where business owners can record customer preferences, manage staff lists and schedules, define services and pricing, set business hours, and customize how services and staff are scheduled
- A business-facing mobile app where business owners can see all of their bookings, access customer lists and contact information, and make manual bookings
Here’s a video to explain the business case:
And another Demo of the Admin Side of things:
Get Started:
On the Office 365 page, select bookings:

You will be asked to enter your business name and description, and then we’re ready to go. Let’s go through the menus on the left:
Home
The Home page gives you access to the new features and product tips, as well as an overview of your Booking activities.

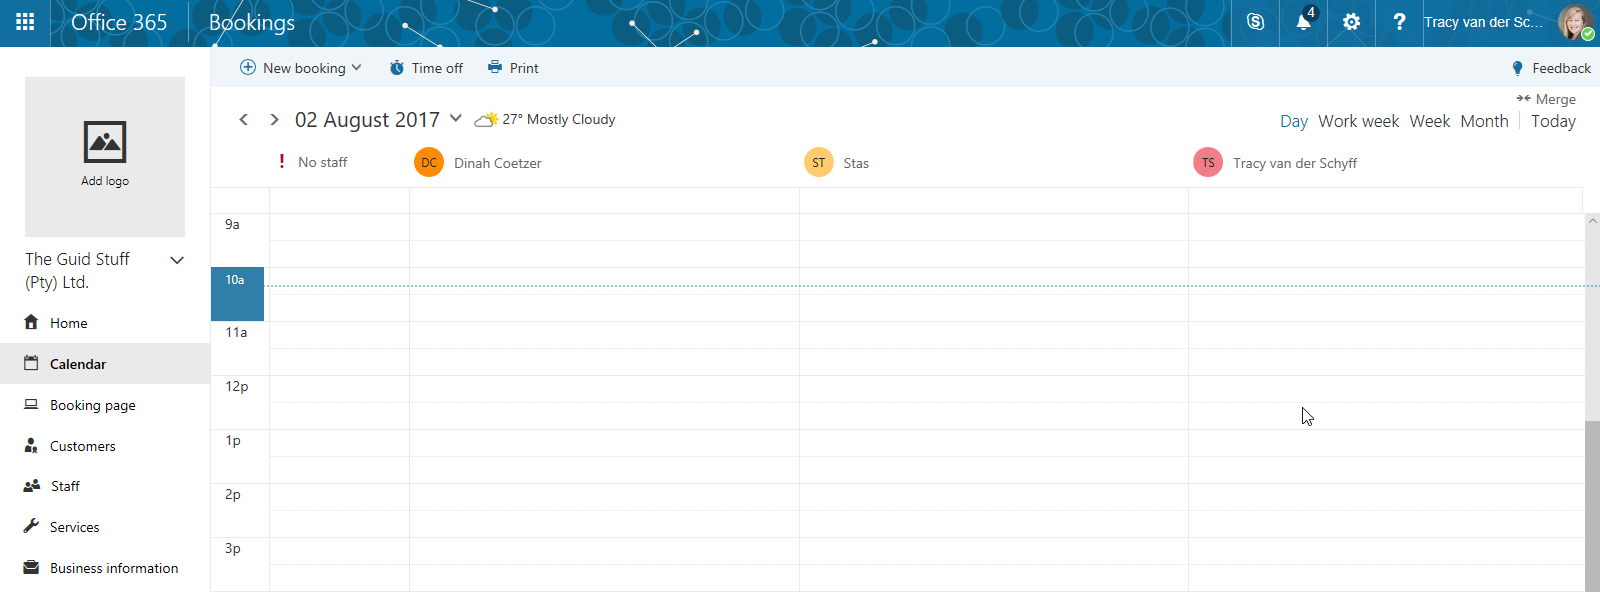
Calendar
This is your Bookings calendar and if calendars are added for sync (under Staff), you will see availability here. You can make bookings here as well and add Time Off for staff.
Booking Page
(I would do this last.) This is where you’ll configure the booking page (external look). Setup your time increments, minimum / maximum lead time, email notifications and whether customers can choose specific staff for bookings. Colour, logo and language and time settings are also adjusted here. Note that after you save and publish, you’ll get a URL you can copy and use on your website, or you can share this via email / Facebook or Twitter. The HTML and iFrame code is also available if you click on Embed in the menu:

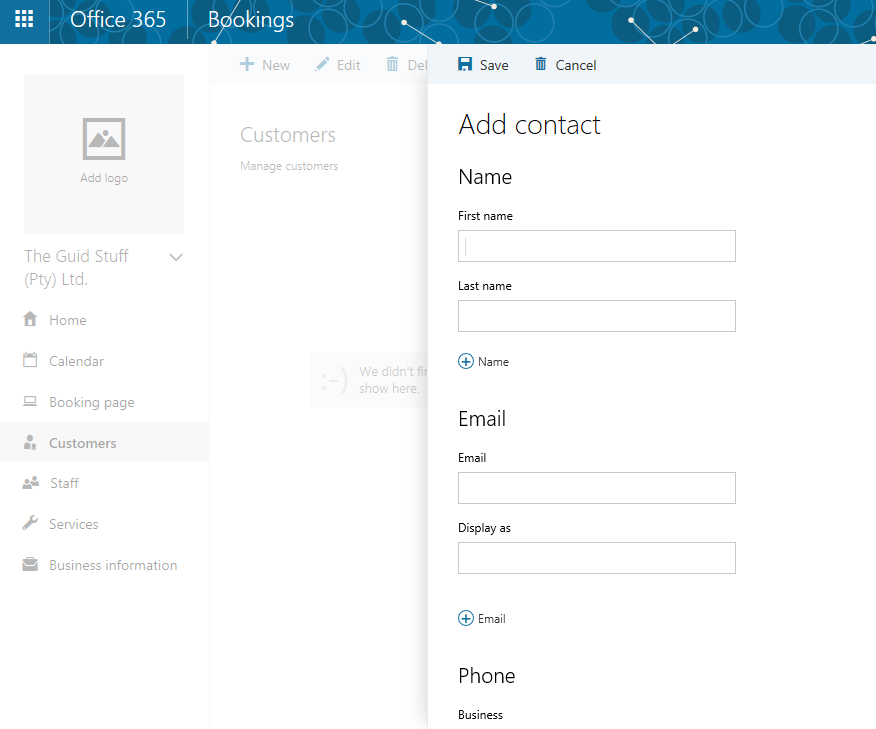
Customers
Setup regular customers and contact details. Take note that you can also setup payments with Bookings: Setting up payments or merchant account with Bookings
Once someone has used the Bookings app, their detail will show under your Customers.
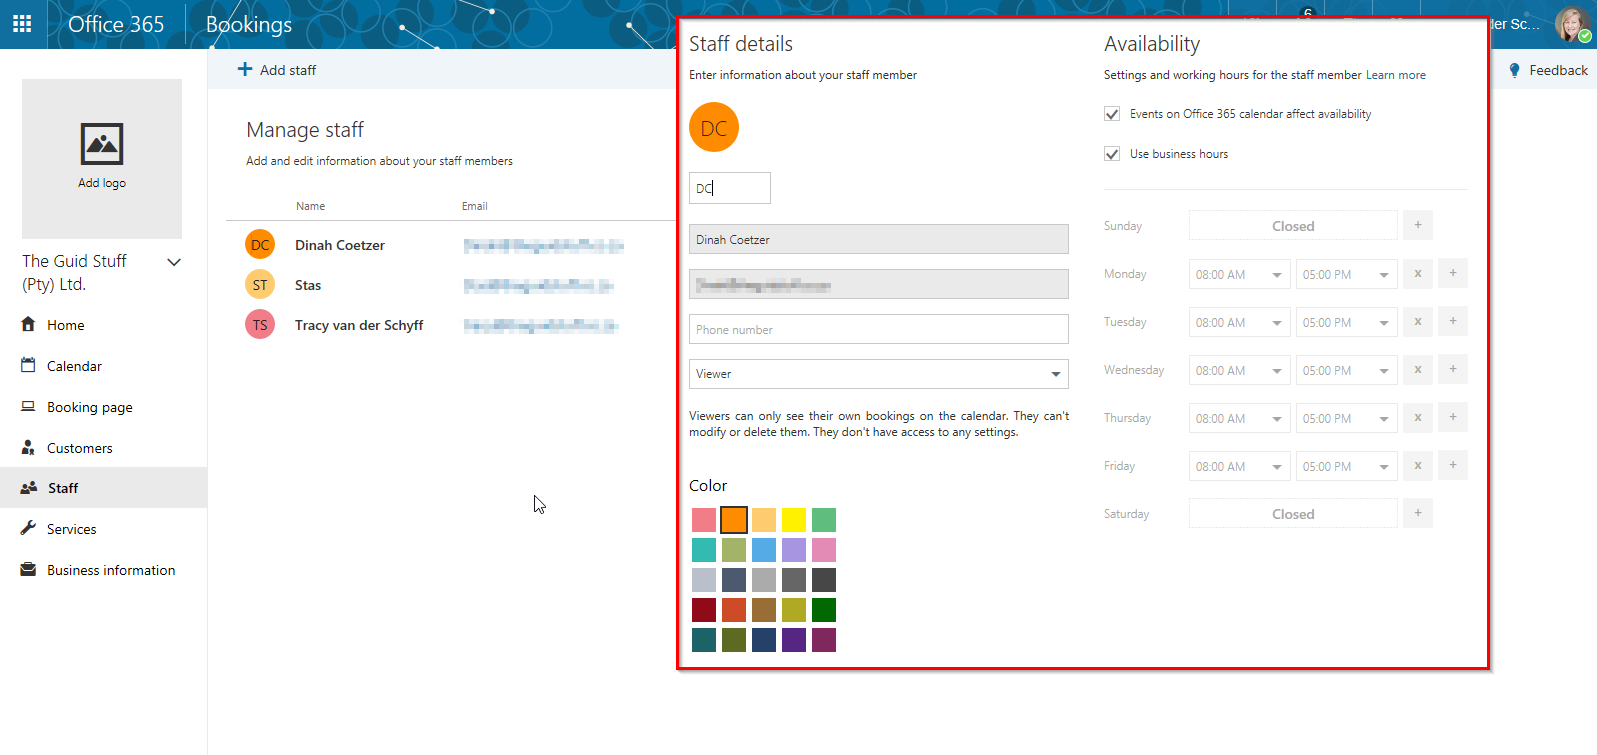
Staff
Edit the staff member to add their availability to the Bookings Calendar as well as specify Business Hours, permissions and colour to use.
- If you or your staff use an Outlook.com or Google calendar, no problem—it integrates with those calendars as well.
- Staff members aren’t required to have Office 365 subscriptions.
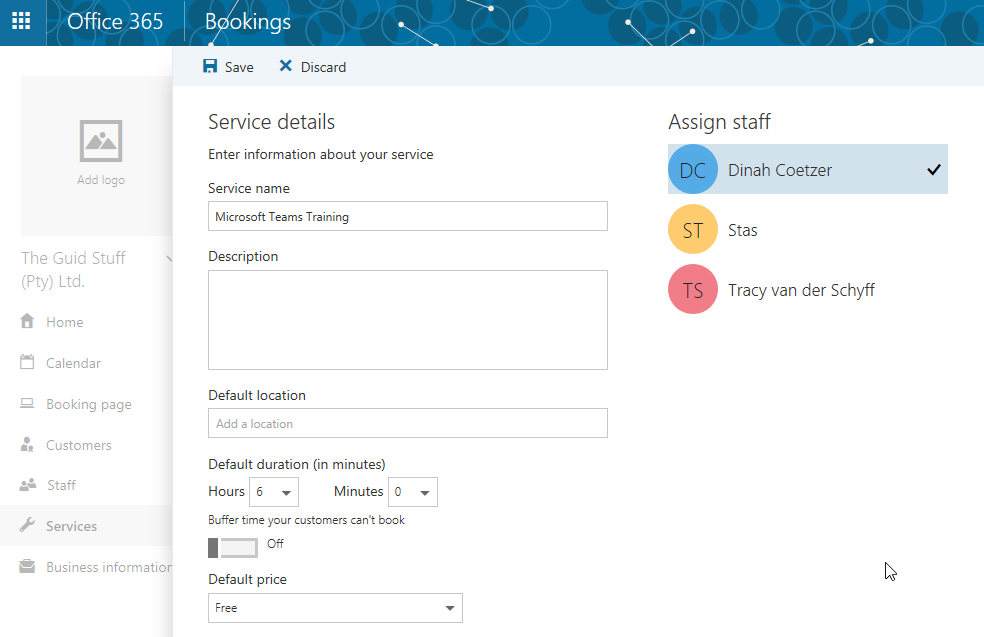
Services
Create services to pick from on the Bookings calendar and assign staff to specific services:
Business Information
Under Business Information you’ll setup Business details, hours, and currency:

Done!! Once you’ve setup your page, saved and published it – you can use the URL to set it up on your website or add it to your Facebook page and share it over social media.
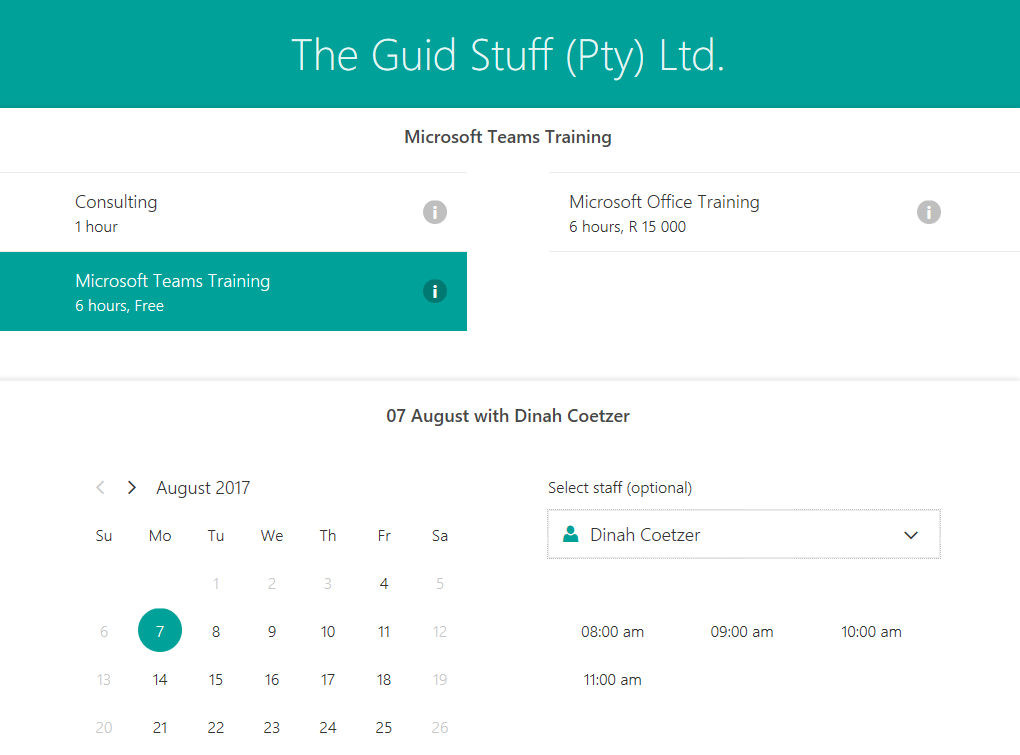
This is how I’ve added it to my website:

This is what the form (page) looks like when it opens. You can select the service, date and time based on the resource availability:
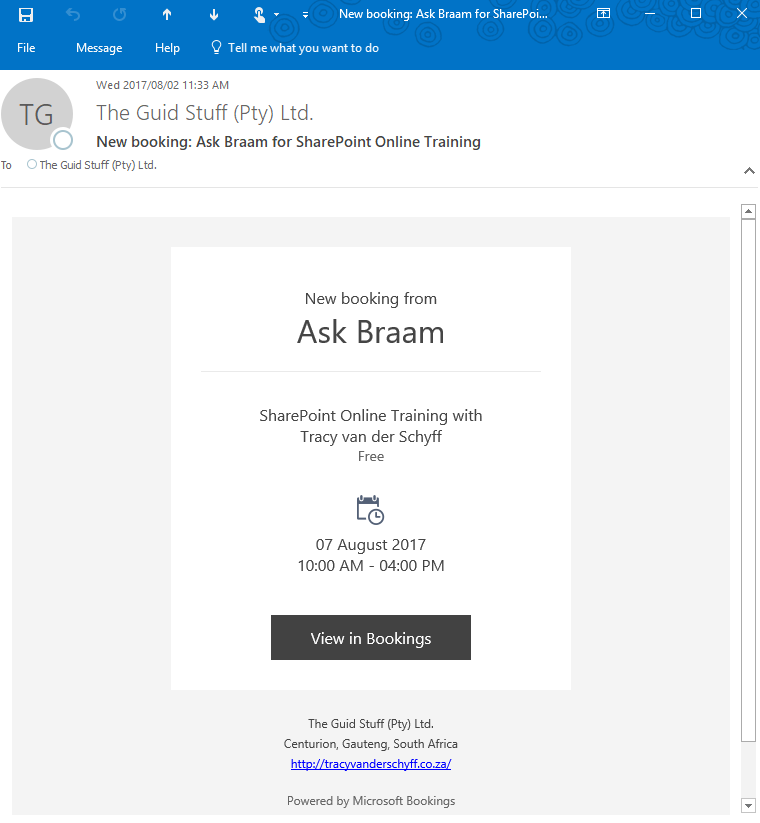
I immediately received an email once the booking was made:
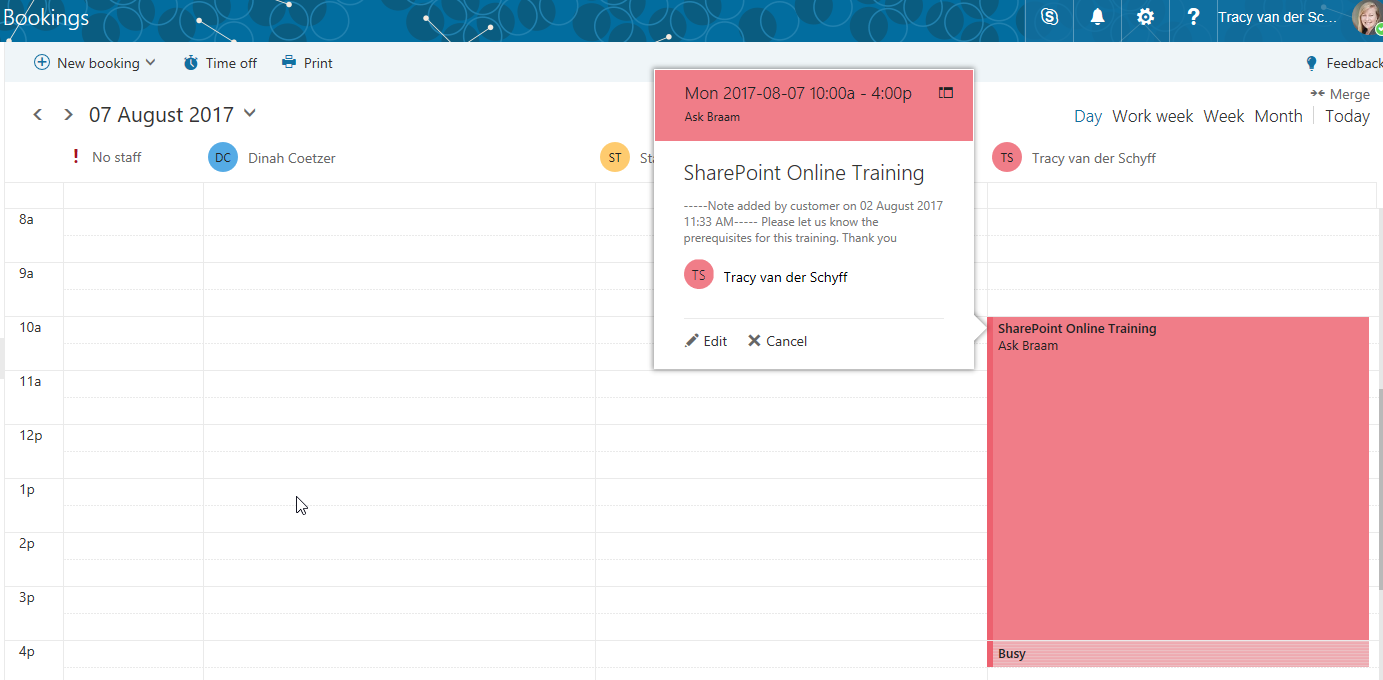
And this is what it looks like on my Bookings calendar:
Pretty cool I tell you. Thanks Microsoft 🙂
More resources:
Bring in business 24/7 with Microsoft Bookings
Use the following how-tos to get up and running with Bookings. Or, watch this video for how to set it up.
- Step 1: Enter your business information
- Step 2: Set your scheduling policies
- Step 3: Define your service offerings
- Step 4: Create your staff list
- Step 5: Set employee working hours
- Step 6: Schedule business closures, time off, and vacation time
- Step 7: Publish or unpublish your booking page
- Step 8: Create and staff your bookings
Say hello to Microsoft Bookings
Online scheduling your customers will love
Purpose of this blog challenge:
I will write 365 blogs in 365 days around Microsoft 365. I did a similar challenge with Office 365, blogs can be found here. I won’t just be talking about the new Microsoft 365 subscription model. I will be sharing any news, tips and tricks around Office / Office 365 / Windows / Mobility and Security. And let’s not forget all the great new Apps & services available. A lot of what I’ll share on Office and SharePoint will also be applicable to none “Office 365” versions.
Feel free to #AskBraam if you have questions or would like me to write about a specific topic. I’ve created a Flow to monitor Twitter for the #AskBraam hashtag and will try my best to incorporate any questions into the blogs, or answer them directly on Twitter. This is a “Learning through Sharing” approach to teach my pet sheep about Microsoft – read more on this here.

Leave a Reply