
Tired of completing text in Word documents, just to have to complete the same metadata again in SharePoint? Did you know you can link certain fields in Word to auto populate metadata in SharePoint? Imagine that?!?!
The Quick Parts in Word can be used for Auto Text, Document Properties, Fields and Building Blocks. To read more about these, click here. In this blog we’ll be taking a look at Document Properties, and how to populate properties in Word, that are linked to metadata (columns) in SharePoint. I’ll be creating a Job Descriptions Library where the Job Descriptions for the company will be added.
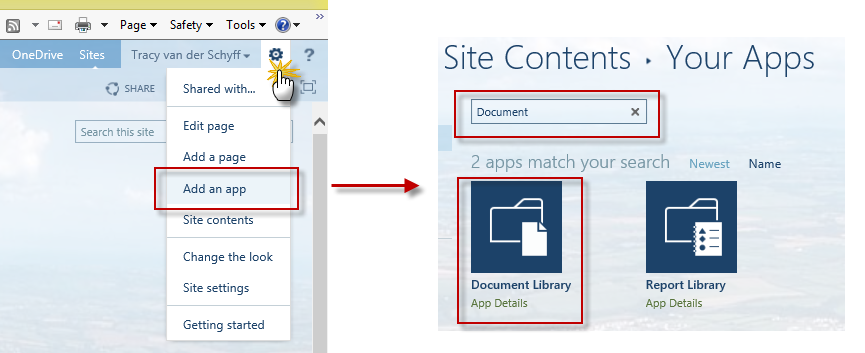
Step 1: Create the library in SharePoint
Go to the settings wheel, click on add an app > select Document Library (Always create apps with an acronym or abbreviation to keep the URL short, then go back and rename the app to give it the full name).
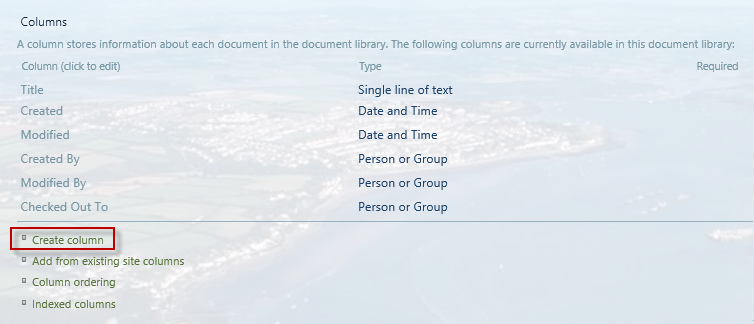
Step 2: Add the columns (document properties) to the library
Go to the Library Tab > Library Settings. Scroll down below the columns and click on “Create Column”. I’ve added columns for Job Title, Line Manager, Summary, Duties & Responsibilities and Department.
![]()
Step 3: Edit the Library template
Once the columns are created you have to edit the library template. This is done by going to the Library Tab > Library Settings. Click on “Advanced”. Under Document Template, click on “Edit Template”.

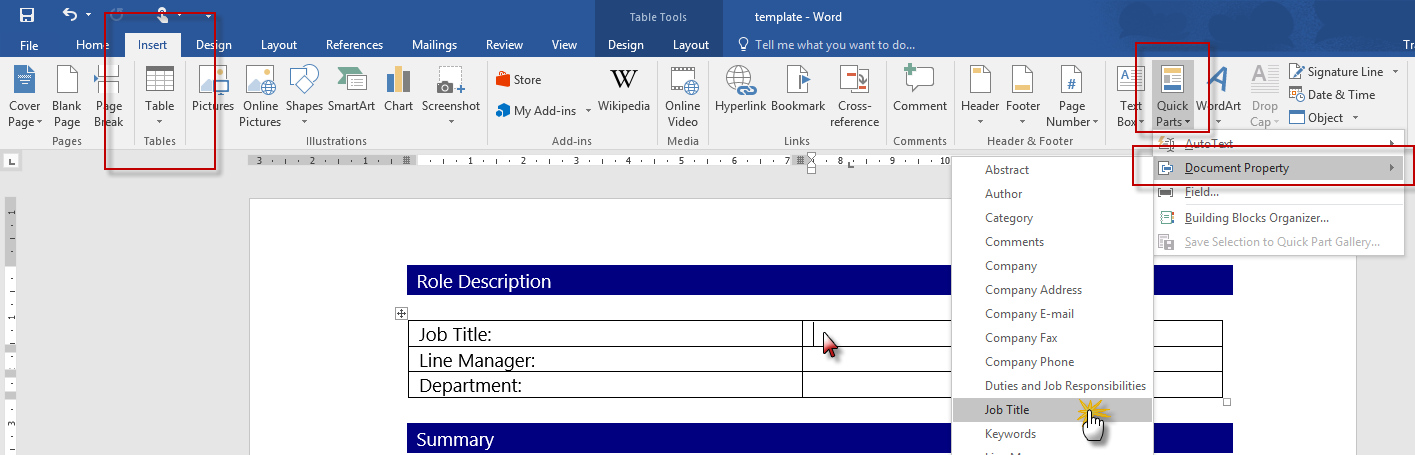
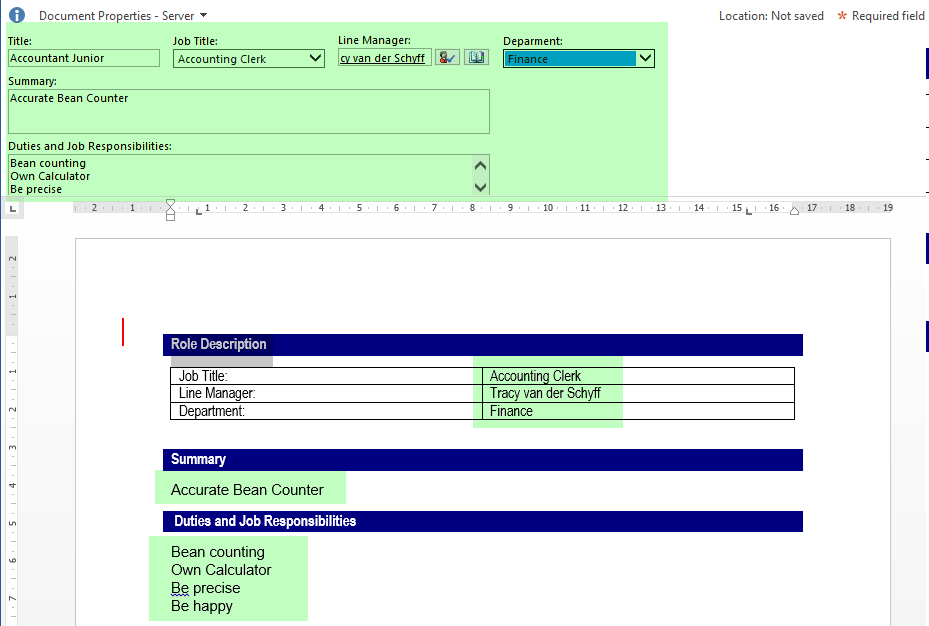
The template will now open in Word, modify this to be your new Job Description Template (you can copy and paste an existing one into the new Word document). Go to the areas that will be linked to the columns you created in SharePoint. Click on the Insert Tab, Quick Parts > Document Properties. You will now see your SharePoint columns in the dropdown. Add these fields where the normal text used to be on the document.
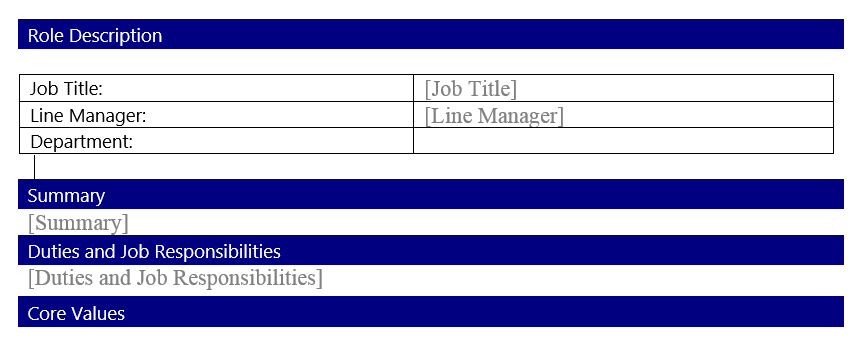
The template should now look like this. Save and close the template.
Step 4: Create a new document
Because we’ve updated the template of the library, user can click on the File Tab > New Document to add a new document based on the template you designed.
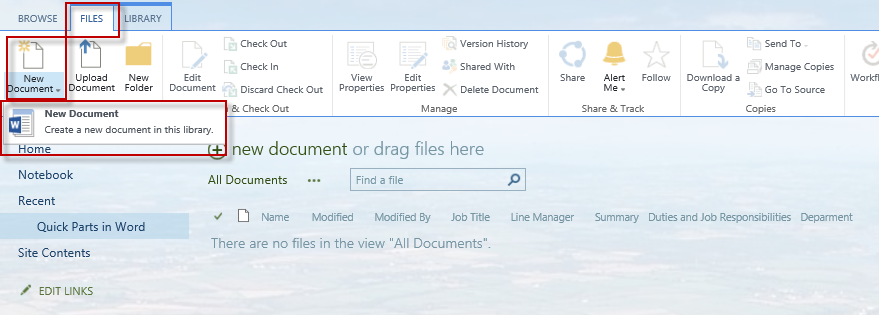
Fill in all the required fields and save the document to the library.
Note: In Office 2013 the Document Properties opens above the document which really helps with completing the fields. Sadly, this has been removed in 2016. You can still complete the fields on the Word document itself and it will publish the data to the columns in SharePoint. Person Pickers and Managed Metadata will not work without the Document Properties Panel.
And that’s it for today’s addition to what’s awesome in Microsoft!!


Leave a Reply