 #Office365Challenge In today’s short post, I’ll show you how to create your own unique icon for your PowerApp.
| Day: | 260 of 365, 105 left |
| Tools: | PowerApps |
| Description: | PowerApps: Create an icon for your App |
| Audience: | End User / Power User |
Edit your App:
- Log into https://powerapps.microsoft.com
- Click on the ellipses of your App and select “Edit on the Web” (I have not used the desktop Studio version).
- If you don’t see your App under Recent – click on the Apps on the right-hand side of the screen.
Your App will now open in the Web editor. Click on the File Tab:
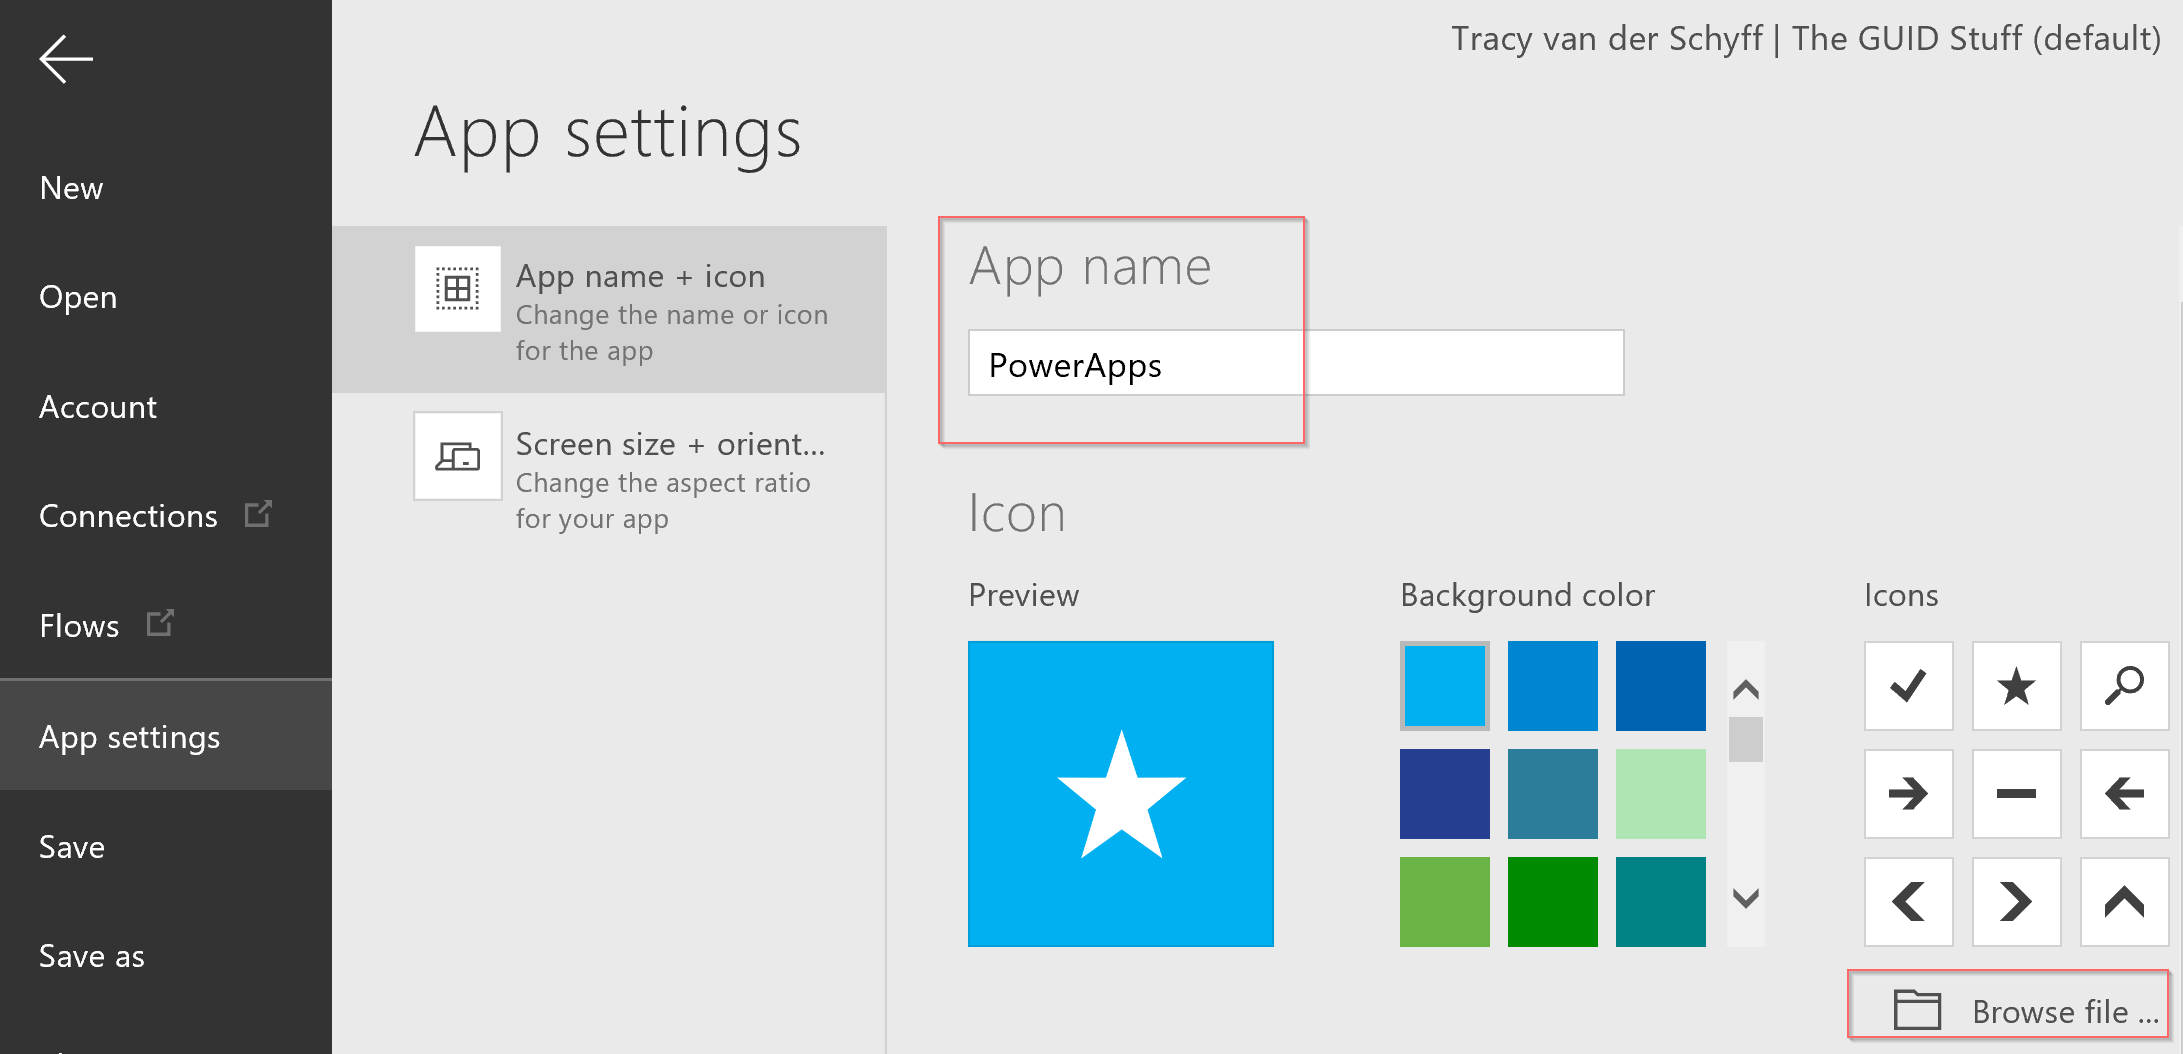
Here under “App Settings” you are able to rename your App, give it a description and change the colour and image for your Icon. Click on Browse file… to upload a new icon to use:
Keep in mind that the icon you upload will be stretched across the square. In other words – your icon needs to have the transparent background space around the icon as it appears below:
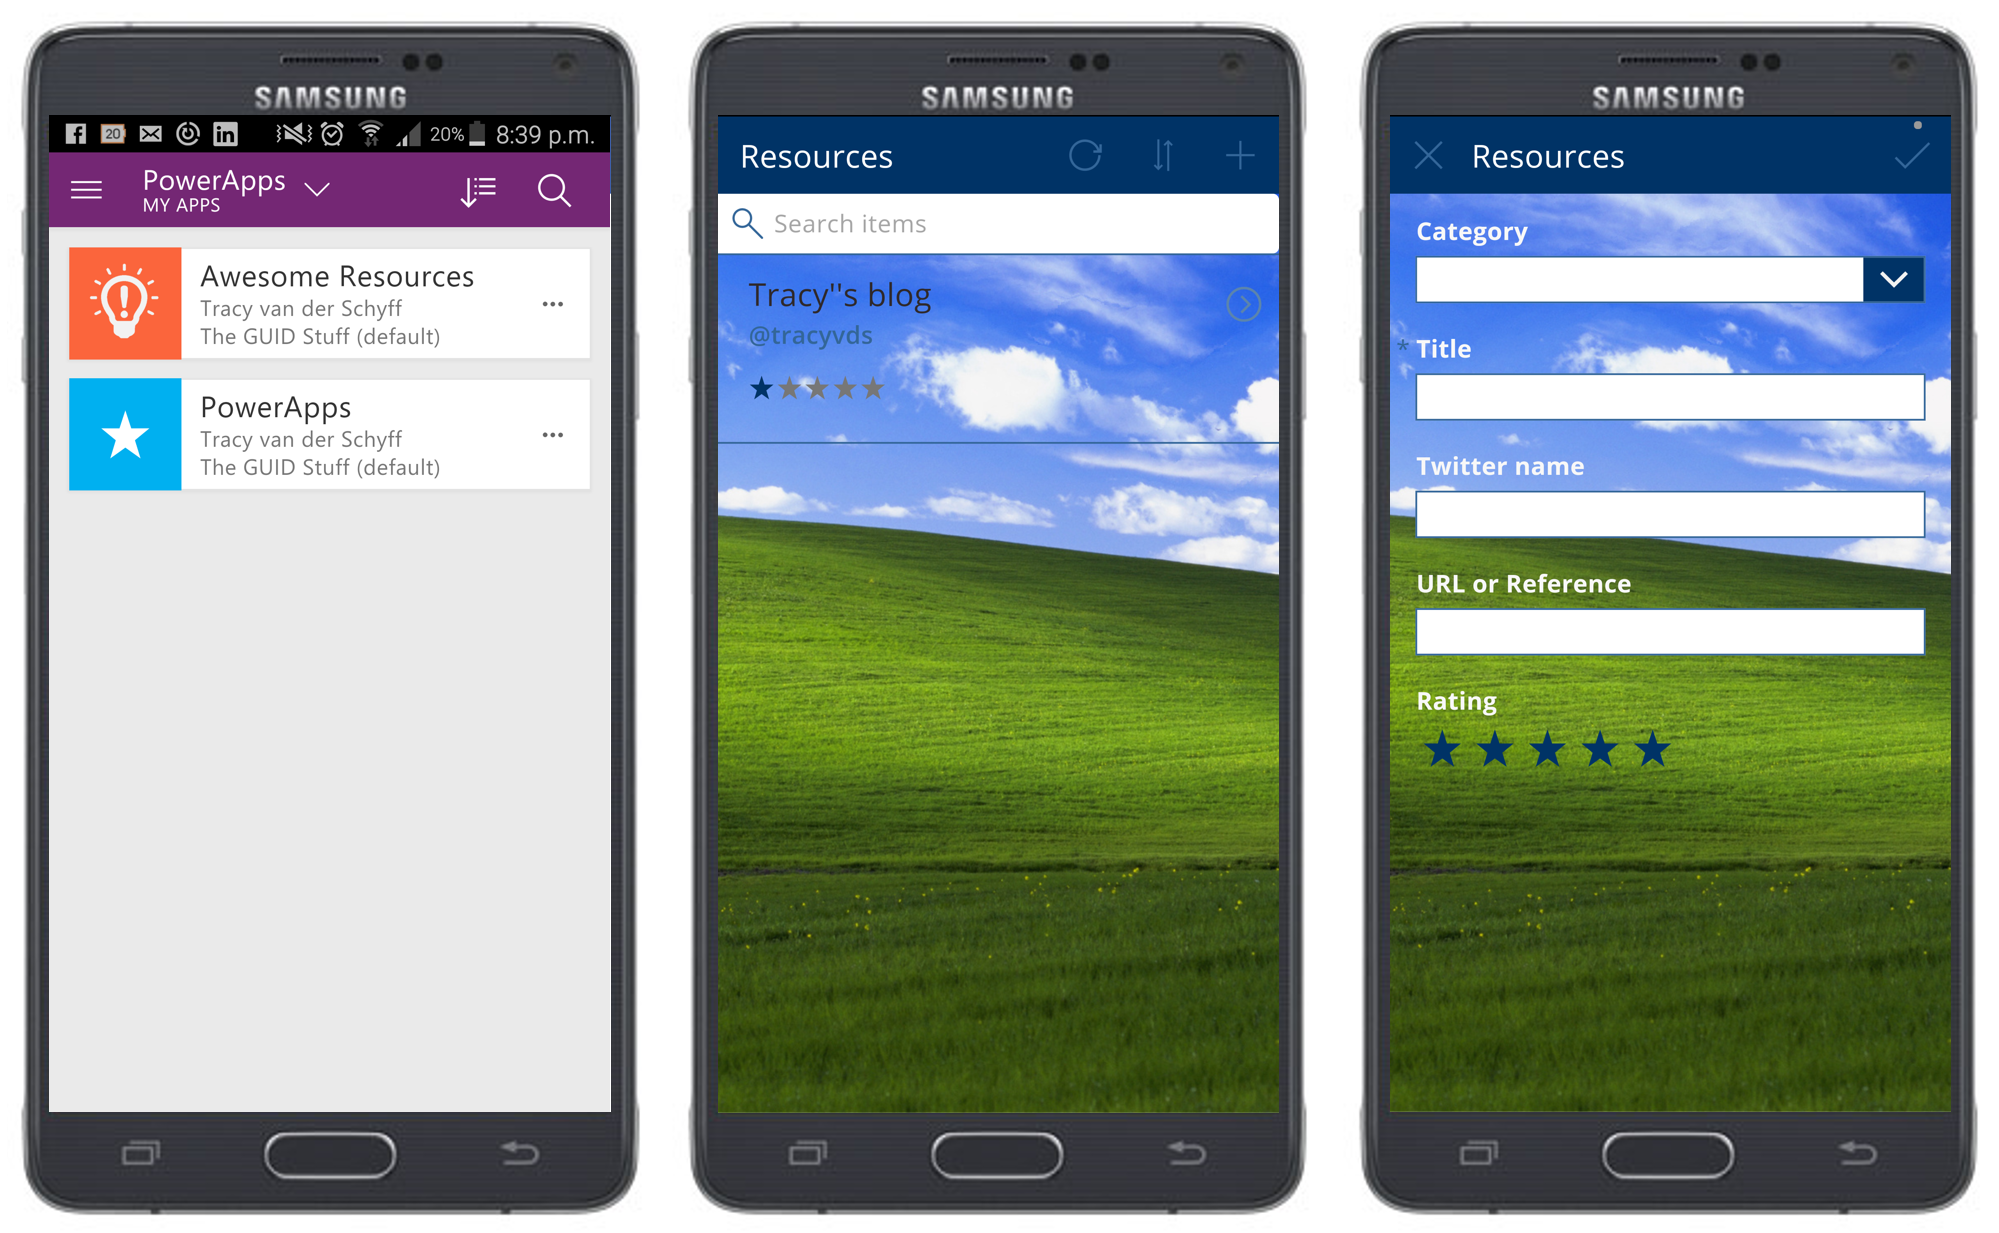
This is what my new button looks like in the app on my phone:
Empowering People, one app at a time…
Overview of my challenge: As an absolute lover of all things Microsoft, I’ve decided to undertake the challenge, of writing a blog every single day, for the next 365 days. Crazy, I know. And I’ll try my best, but if I cannot find something good to say about Office 365 and the Tools it includes for 365 days, I’m changing my profession. So let’s write this epic tale of “Around the Office in 365 Days”. My ode to Microsoft Office 365.
Keep in mind that these tips and tricks do not only apply to Office 365 – but where applicable, to the overall Microsoft Office Suite and SharePoint.


Leave a Reply